달력

5

« 2024/5 »

  • 1
  • 2
  • 3
  • 4
  • 5
  • 6
  • 7
  • 8
  • 9
  • 10
  • 11
  • 12
  • 13
  • 14
  • 15
  • 16
  • 17
  • 18
  • 19
  • 20
  • 21
  • 22
  • 23
  • 24
  • 25
  • 26
  • 27
  • 28
  • 29
  • 30
  • 31
반응형

날짜의 분기(Quarter)를 구해서 자동으로 달력 input에 매핑해 주면

실 사용자들이 편리하겠다라는 생각이 들어서 바로 작업을 진행하였다.


분기의 규칙만 알면 간단하게 진행할 수 있었는데 수학적으로 표현하자면

1/1 ~ 3/31은 1분기, 

4/1 ~ 6/30은 2분기,

7/1 ~ 9/30은 3분기,

10/1 ~ 12/31은 4분기 이므로 분기 시작 월을 구하려면 다음과 같은 규칙을 꺼낼 수 있었다.

현재 분기 = 현재 월/3의 소수점 1번째 자리 올림
분기 시작 월 = (현재 분기 - 1)* 3 + 1


하지만 javascript에서 월은 0~11로 표현되므로 아래 소스코드의 수식으로 변환되었다.

(분기도 0~3으로 표현되도록 함)

var quarter = parseInt(date.getMonth() / 3);
var startMonth = quarter * 3;


분기 끝 날짜를 구하려면 시작일에 2개월을 더하고 해당 월의 마지막 날짜를 구한다.

var endDate = getMonthLastDate(new Date(addMonths(new Date(startDate), 2)));


이전/다음 분기는 분기마다 3개월 씩 차이나므로 현재 날짜의 월에 3씩 이동해서 구하면 된다.

(단, 3월 31일에 3개월을 더할 경우 6월 31일이 되는데 이는 존재하지 않는 날짜로 js에서 7월 1일으로 자동 변환된다.

때문에 날짜를 1일로 셋팅하고 구해야 일(day)에 따른 버그가 생기지 않는다.)

var date = addMonths((new Date(now.setDate(1))), count*3);


그렇게 완성된 소스코드는 다음과 같다.

<script type="text/javascript">
	function getQuarterStartDate(date) {
		var year = date.getFullYear();
		var quarter = parseInt(date.getMonth() / 3);
		var startMonth = quarter * 3;
		
		return (new Date(year, startMonth, 2)).toISOString().substring(0, 10);
	}
	
	function getMonthLastDate(date) {
		
		return (new Date(date.getFullYear(), date.getMonth()+1, 1)).toISOString().substring(0, 10);
	}

	function addMonths(orgDate, count) {
		
		return (new Date(orgDate.setMonth(orgDate.getMonth() + count))).toISOString().substring(0, 10);
	}
	
	function setDate(startId, endId, count) {
		var now = new Date();
		var date = addMonths((new Date(now.setDate(1))), count*3);
		var startDate = getQuarterStartDate(new Date(date));
		var endDate = getMonthLastDate(new Date(addMonths(new Date(startDate), 2)));

		$("#"+startId).val(startDate);
		$("#"+endId).val(endDate);
	}
	
	var quarterCnt = 0;
	
	function moveQuarter(count) {
		quarterCnt += count;
		setDate("startDate", "endDate", quarterCnt);
	}
	
	$(function() {
		setDate("startDate", "endDate", quarterCnt);
	});
</script>
<html>
    <body>
        <button type="button" onClick="moveQuarter(-1)">◀</button>
        <input type="text" id="startDate" name="startDate" readonly/>
        <input type="text" id="endDate" name="endDate" readonly/>
        <button type="button" onClick="moveQuarter(1)">▶</button>
    </body>
</html>


반응형
:
Posted by 리샤씨
반응형

일전에 이미지를 특정 영역에서 크기와 위치가 변경될 수 있는 기능을 만들어야 하는 일이 있었다.
당시 pub.dev에서 해당 기능이 구현되어 있는 패키지를 찾아보았지만 딱 맞는 것이 없었다.
 
결국 제스처로 크기(scale)와 x축 y축을 통해 위치를 자유롭게 조정할 수 있는 matrix_gesture_detector를 발견해서
아래 소스를 작성하여 원하는 기능을 구현할 수 있었다.
 
1. yaml을 작성한다.

path_provider: 2.0.1
matrix_gesture_detector: 0.1.0

 
2. moveImage.dart를 작성한다.

import 'dart:io';

import 'package:flutter/material.dart';
import 'package:flutter/services.dart' show rootBundle;
import 'package:matrix_gesture_detector/matrix_gesture_detector.dart';
import 'package:path_provider/path_provider.dart';

class moveImage extends StatefulWidget {
  String path;
  String fileType;
  double width;
  double height;

  @override
  _moveImageState createState() => _moveImageState();

  moveImage({
    @required this.path,
    this.fileType = "storage",
    this.width = 450,
    this.height = 250,
    Key key})
      : super(key: key);
}

class _moveImageState extends State<moveImage> {
  Map<String, dynamic> item = {};
  
  @override
  void initState() {
    super.initState();
    setImageFileInfo();
  }

  @override
  Widget build(BuildContext context) {
    return Container(
        width: widget.width,
        height: widget.height,
        child: moveImage(this.item)
    );
  }

  Widget moveImage(item) {
    return new FutureBuilder<File>(
        future: item["fileType"] == "assets" ? getImageFileFromAssets(item["path"]) : getFile(item["path"]),
        builder: (context, snapshot) {
          if (snapshot.data == null || item["matrix"] == null) {
            return Container();
          } else {
            return MatrixGestureDetector(
                shouldRotate: false,
                shouldScale: true,
                onMatrixUpdate: (m, tm, sm, rm) {
                  setState(() {
                    var maxWidth = widget.width;
                    var maxHeight = widget.height;
                    var width = item["width"];
                    var height = item["height"];

                    Matrix4 matrix = Matrix4.identity();
                    matrix = MatrixGestureDetector.compose(item["matrix"], tm, sm, rm);
                    Offset translation = MatrixGestureDetector.decomposeToValues(matrix).translation;
                    Size changeSize = MatrixUtils.transformRect(matrix, item["transformKey"].currentContext.findRenderObject().paintBounds).size;

                    var initialScale = item["initialScale"];
                    var changeWidth = changeSize.width;
                    var changeHeight = changeSize.height;

                    var chkRatio = changeHeight/maxHeight;

                    if (initialScale / 2.0 <= chkRatio && chkRatio <= initialScale + 2.0) {
                      Offset currentTranslation = MatrixGestureDetector.decomposeToValues(item["matrix"]).translation;

                      var fullHeight = height * maxWidth / width;
                      var fullChangeWidth = width * changeHeight / height;
                      var fullChangeHeight = height * changeWidth / width;
                      if (fullHeight >= maxHeight) {
                        if (translation.dy > 0 || translation.dx > 0
                            || changeHeight + translation.dy < maxHeight || fullChangeWidth + translation.dx < maxWidth) {
                          var dy = translation.dy, dx = translation.dx;

                          if (changeHeight >= maxHeight) {
                            if (translation.dy > 0) {
                              dy = 0.0;
                            }
                            if (changeHeight + translation.dy < maxHeight) {
                              if (changeHeight > maxHeight) {
                                dy = maxHeight - changeHeight;
                              } else {
                                dy = currentTranslation.dy;
                              }
                            }
                          } else {
                            if (maxHeight < changeHeight + translation.dy) {
                              dy = maxHeight - changeHeight;
                            } else if (0.0 > currentTranslation.dy + translation.dy) {
                              dy = 0.0;
                            } else {
                              dy = translation.dy;
                            }
                          }

                          if (fullChangeWidth >= maxWidth) {
                            if (translation.dx > 0){
                              dx = 0.0;
                            }
                            if (fullChangeWidth + translation.dx < maxWidth) {
                              if (fullChangeWidth > maxWidth) {
                                dx = maxWidth - fullChangeWidth;
                              } else {
                                dx = currentTranslation.dx;
                              }
                            }
                          } else {
                            if (maxWidth < fullChangeWidth + translation.dx) {
                              dx = maxWidth - fullChangeWidth;
                            } else if (0.0 > currentTranslation.dx + translation.dx) {
                              dx = 0.0;
                            } else {
                              dx = translation.dx;
                            }
                          }

                          tm = translateMatrix(new Offset(dx - currentTranslation.dx, dy - currentTranslation.dy));
                          matrix = MatrixGestureDetector.compose(item["matrix"], tm, sm, rm);
                        }
                      } else {
                        if (translation.dy > 0 || translation.dx > 0
                            || fullChangeHeight + translation.dy < maxHeight || changeWidth + translation.dx < maxWidth) {
                          var dy = translation.dy, dx = translation.dx;

                          if (fullChangeHeight >= maxHeight) {
                            if (translation.dy > 0) {
                              dy = 0.0;
                            }
                            if (fullChangeHeight + translation.dy < maxHeight) {
                              if (fullChangeHeight > maxHeight) {
                                dy = maxHeight - fullChangeHeight;
                              } else {
                                dy = currentTranslation.dy;
                              }
                            }
                          } else {
                            if (maxHeight < fullChangeHeight + translation.dy) {
                              dy = maxHeight - fullChangeHeight;
                            } else if (0.0 > currentTranslation.dy + translation.dy) {
                              dy = 0.0;
                            } else {
                              dy = translation.dy;
                            }
                          }

                          if (changeWidth >= maxWidth) {
                            if (translation.dx > 0){
                              dx = 0.0;
                            }
                            if (changeWidth + translation.dx < maxWidth) {
                              if (changeWidth > maxWidth) {
                                dx = maxWidth - changeWidth;
                              } else {
                                dx = currentTranslation.dx;
                              }
                            }
                          } else {
                            if (maxWidth < changeWidth + translation.dx) {
                              dx = maxWidth - changeWidth;
                            } else if (0.0 > currentTranslation.dx + translation.dx) {
                              dx = 0.0;
                            } else {
                              dx = translation.dx;
                            }
                          }

                          tm = translateMatrix(new Offset(dx - currentTranslation.dx, dy - currentTranslation.dy));
                          matrix = MatrixGestureDetector.compose(item["matrix"], tm, sm, rm);
                        }
                      }
                      item["matrix"] = matrix;
                    }
                  });
                }, child: new Transform( key: item["transformKey"], transform: item["matrix"],
                child: new Image.file(snapshot.data, fit:BoxFit.contain, alignment: Alignment.topLeft,)
              )
            );
          }
        });
  }

  Matrix4 translateMatrix(Offset translation) {
    var dx = translation.dx;
    var dy = translation.dy;

    return Matrix4(1, 0, 0, 0, 0, 1, 0, 0, 0, 0, 1, 0, dx, dy, 0, 1);
  }

  Future setImageFileInfo() async {
    this.item["path"] = widget.path;
    this.item["fileType"] = widget.fileType;

    if (this.item["transformKey"] == null) {
      this.item["transformKey"] = new GlobalKey();
    }

    File image;
    if (this.item["fileType"] == "assets") {
      image = await getImageFileFromAssets(this.item["path"]);
    } else {
      image = new File(this.item["path"]);
    }
    var decodedImage = await decodeImageFromList(image.readAsBytesSync());
    this.item["width"] = decodedImage.width.toDouble();
    this.item["height"] = decodedImage.height.toDouble();

    var maxWidth = widget.width;
    var maxHeight = widget.height;
    var width = this.item["width"];
    var height = this.item["height"];

    var widthRatio = (maxWidth/width);
    var heightRatio = (maxHeight/height);
    var initialScale = (heightRatio/widthRatio);

    var fullHeight = height * maxWidth / width;
    if (fullHeight >= maxHeight) {
      initialScale = (widthRatio/heightRatio);
    }

    setState(() {
      this.item["initialScale"] = initialScale;
      this.item["matrix"] = Matrix4.identity().scaled(initialScale);
    });
  }
}

Future<File> getImageFileFromAssets(String path) async {
  final byteData = await rootBundle.load('assets/$path');

  String tmpPath = '${(await getTemporaryDirectory()).path}/$path';

  final file = File(tmpPath);
  await file.create(recursive: true);
  await file.writeAsBytes(byteData.buffer.asUint8List(byteData.offsetInBytes, byteData.lengthInBytes));

  return file;
}

Future<File> getFile(String path) async {
  return File(path);
}

 
3. 작성한 moveImage.dart를 widget으로 사용할 화면의 dart 소스에서 불러온다.

moveImage(
  path: "test.jpeg",
  fileType: "assets",
),

 
위 예시는 assets에 있는 이미지 기준으로 작성되어 있으며
휴대폰에 있는 사진첩에서 이미지를 가져온다면(권한 관련 처리도 필수!)
fileType를 없애고 path에 이미지의 실제 경로(사진 선택 기능을 통해 알게 된 경로)를 넣어주면 된다.


참고 : https://pub.dev/packages/matrix_gesture_detector

반응형
:
Posted by 리샤씨
반응형

최근 Flutter TextField에서 숫자 입력 시 천 단위 마다 콤마를 표시되도록 해야하는 일이 생겼는데

이게 생각보다 간단하지 않았다. 

일단 숫자 입력만 되도록 제한하고 천 단위 마다 콤마 표시하는 것 자체는 크게 어렵지 않았는데,

콤마를 표시하면 그것도 자리 차지를 하게 되어 중간에서 입력/삭제 후 자연스러운 커서 위치를 잡기가 어려웠지만

규칙을 찾아 수식을 작성해서 해결했다.


완성된 코드는 다음과 같다.

import 'package:flutter/services.dart';
import 'package:flutter/material.dart';
import 'package:intl/intl.dart';

class ThousandCommaTextField extends StatelessWidget {
  @override
  Widget build(BuildContext context) {
    return Scaffold(
      backgroundColor: Color(0xffffffff),
      body: SafeArea(
        child: Container(
          padding: EdgeInsets.all(10),
          child: Column(
            mainAxisAlignment: MainAxisAlignment.center,
            children: [
              TextField(
                keyboardType: TextInputType.number,
                textAlign: TextAlign.right,
                inputFormatters: <TextInputFormatter>[
                  FilteringTextInputFormatter.allow(RegExp(r'[0-9]')),
                  FilteringTextInputFormatter.digitsOnly,
                  ThousandCommaInputFormatter()
                ],
              )
            ],
          )
        )
      ),
    );
  }
}

String thousandComma(dynamic val, {String defaultVal = ""}) {
  NumberFormat numberFormat = NumberFormat('#,###', "ko_KR");
  if (val != null && val != "") {
    if (val is int || val is double) {
      return numberFormat.format(val);
    } else if (double.tryParse(val) != null) {
      return numberFormat.format(double.parse(val));
    } else if (int.tryParse(val) != null) {
      return numberFormat.format(int.parse(val));
    }
  }

  return defaultVal;
}

class ThousandCommaInputFormatter extends TextInputFormatter {
  TextEditingValue formatEditUpdate(TextEditingValue oldValue, TextEditingValue newValue) {
    String oldNum = oldValue.text.replaceAll(",", "");
    String newNum = newValue.text.replaceAll(",", "");

    String newText = thousandComma(newValue.text, defaultVal: "0");

    // 다음 커서 위치 잡기
    int selectionIndex = ((newValue.text.length -1) / 3).floor() // 전체 ,(comma)의 수
                        - (((newValue.text.length - newValue.selection.end)-1) / 3).floor() //현재 커서 위치를 기준으로 오른쪽에 있는 ,(comma)의 수
                        + newValue.selection.end;

    if (selectionIndex > newText.length) {
      selectionIndex = newText.length;
    }

    if (oldNum == newNum) {//,(comma) 뒤에 커서놓고 삭제 시
      //1,234,567에서 4,뒤(커서 위치 6)에서 삭제하면 123,567이 되므로 1뒤의 ,와 4가 같이 없어져서 커서 위치가 2만큼 왼쪽으로 이동해야 한다. (최종 커서 위치 4가 되야함)
      //98,765에서 8,뒤(커서 위치 3)에서 삭제하면 9,765가 되므로 8만 없어져서 커서 위치가 1만큼 왼쪽으로 이동해야 한다. (최종 커서 위치 2가 되야함)
      selectionIndex = selectionIndex - (newText.replaceAll(",", "").length % 3 == 1 ? 2 : 1);
      newText = newValue.text.substring(0, newValue.selection.end - 1) + newValue.text.substring(newValue.selection.end);
      newText = thousandComma(newText, defaultVal: "0");
    }

    return newValue.copyWith(
        text: newText,
        selection: TextSelection.collapsed(
            offset: selectionIndex));
  }
}


참고 출처:

https://stackoverflow.com/questions/49577781/how-to-create-number-input-field-in-flutter

https://stackoverflow.com/questions/61866207/thousand-separator-without-decimal-separator-on-textformfield-flutter

반응형
:
Posted by 리샤씨
반응형

가끔가다, 파일 첨부 시 첨부된 파일의 용량을 보여줘야 할 때가 있다.

보통 파일 첨부 시 알 수 있는 것은 로우한 파일 크기인데,

필요한 건 해당 값을 1024로 나눈 값인 KB/MB/GB 등등이다.


처음엔 JS에서만 사용했었는데 최근 flutter에서도 필요하게 되어 두 가지 버전을 공유한다.


javascript 버전

function spaceFormat(spaceValue, decimalPoint){
	var fileSizeNmList = ["Byte", "KB", "MB", "GB", "TB", "PB", "EB", "ZB", "YB"];
	var fileSizeNmIndex = 0;
	
	while (spaceValue > 1024 && fileSizeNmIndex < fileSizeNmList.length) {
		spaceValue /= 1024;
		fileSizeNmIndex++;
	}
	
	if (spaceValue.toFixed != undefined) {
		spaceValue = spaceValue.toFixed(decimalPoint);
	}
	return spaceValue + fileSizeNmList[fileSizeNmIndex];
}


flutter 버전

String spaceFormat(double spaceValue, int decimalPoint){
  List<String> fileSizeNmList = ["Byte", "KB", "MB", "GB", "TB", "PB", "EB", "ZB", "YB"];
  int fileSizeNmIndex = 0;

  while (spaceValue > 1024 && fileSizeNmIndex < fileSizeNmList.length) {
    spaceValue /= 1024;
    fileSizeNmIndex++;
  }

  return spaceValue.toStringAsFixed(decimalPoint) + fileSizeNmList[fileSizeNmIndex];
}


반응형
:
Posted by 리샤씨
2022. 8. 3. 11:22

Flutter에서 Flick 화면 만들기 개발/Flutter2022. 8. 3. 11:22

반응형

일전에 Flick(한 방향으로 미는 것을 말한다고 한다. 참고 : https://thankee.tistory.com/117) 동작을 하는 화면을 요청 받은 적이 있었다.

그때는 한 방향으로 밀면 화면이 밀은 그대로 높이를 이동시키는 화면이었는데

최근 또 다른 프로젝트를 하는데 비슷한 동작을 하는 화면이 있어서

일전에 만든 소스를 활용해서 좀 더 범용성 있게 작성해보았다.


이번에 필요한 화면은 똑같은 동작으로 화면의 높이를 변화시키지만,

고정적인 세 가지 위치(최저/중간/최대)로만 이동이 가능한 기능과

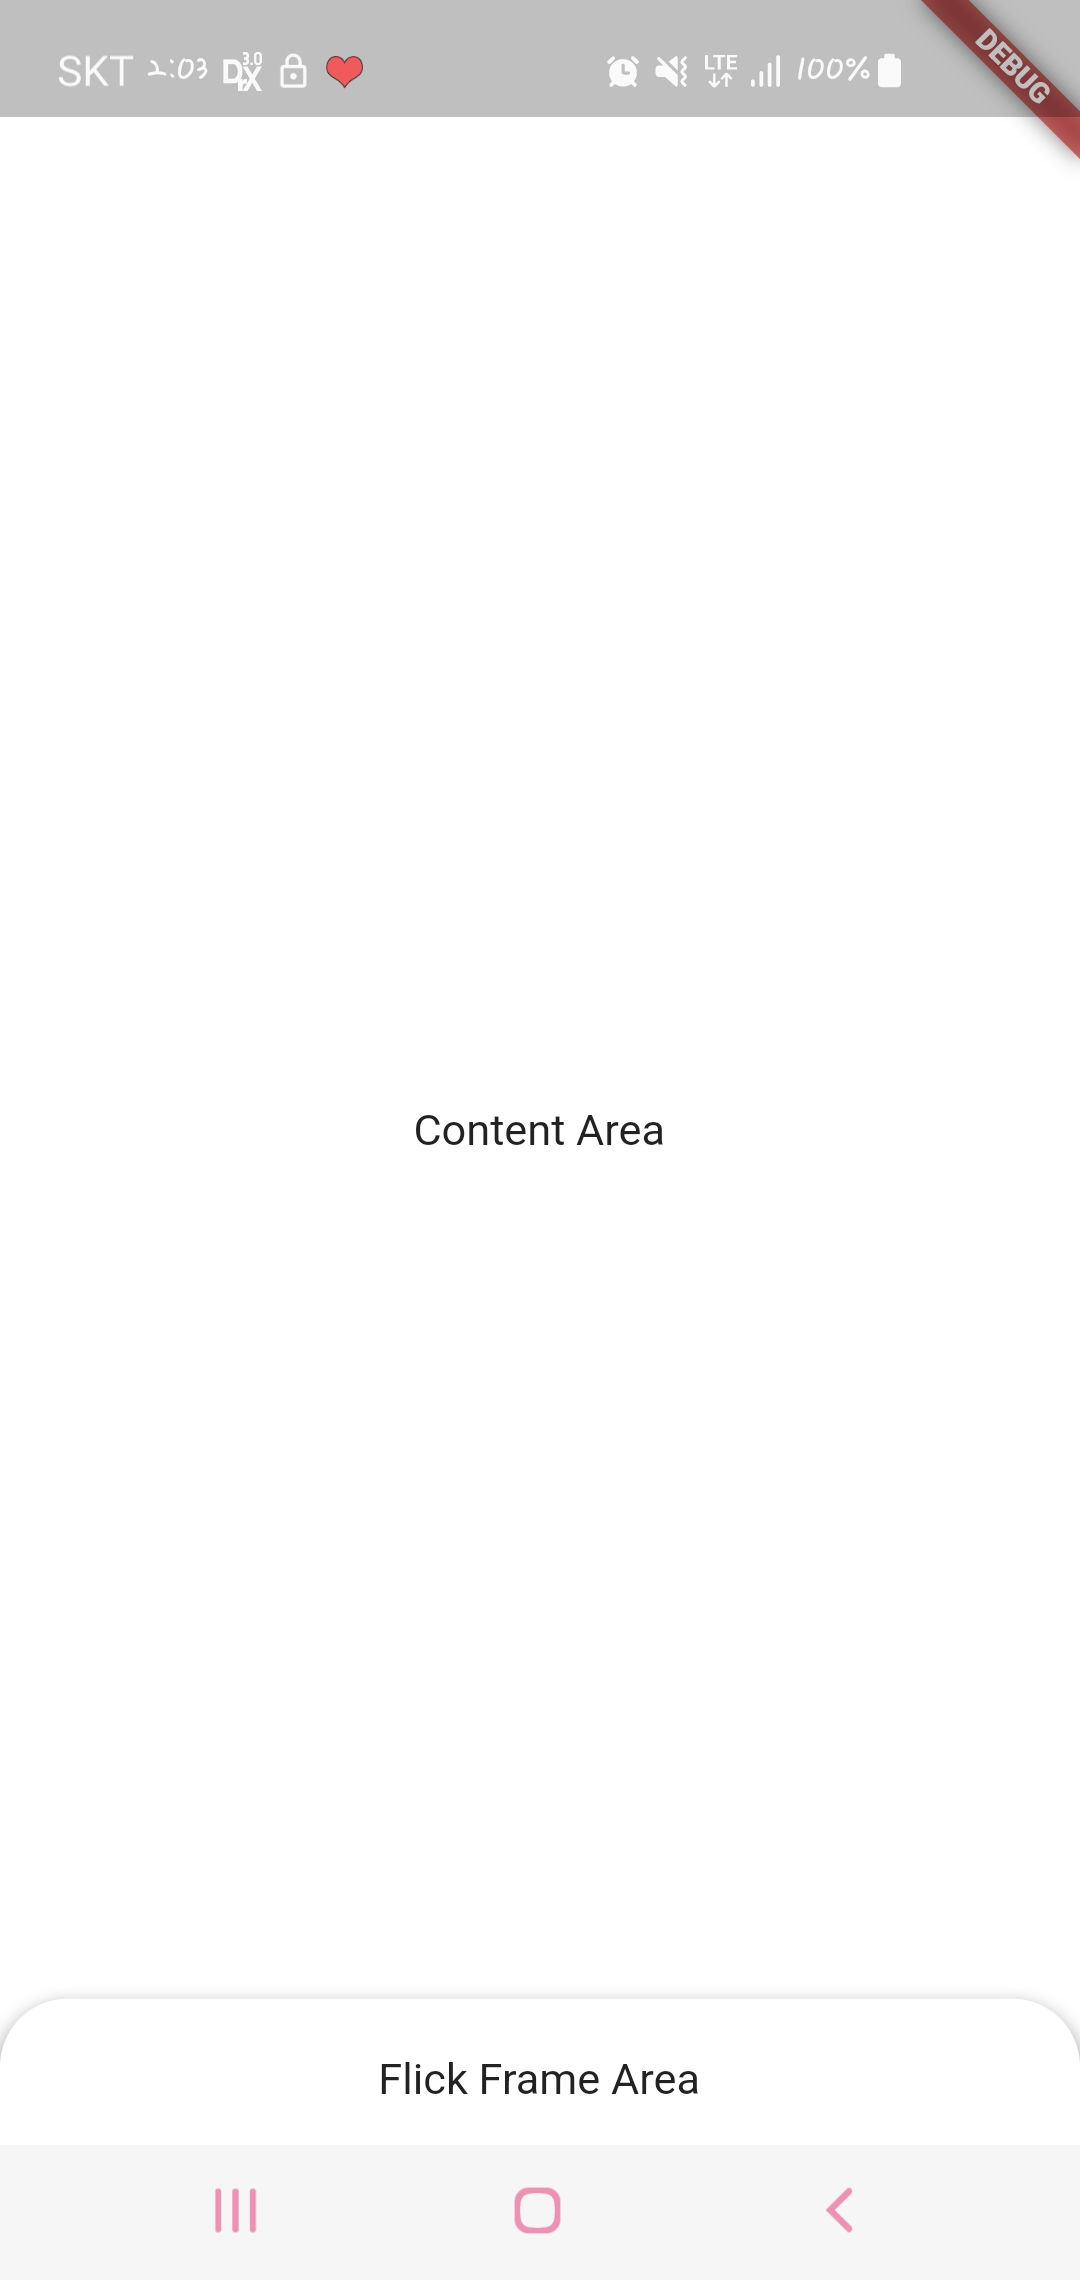
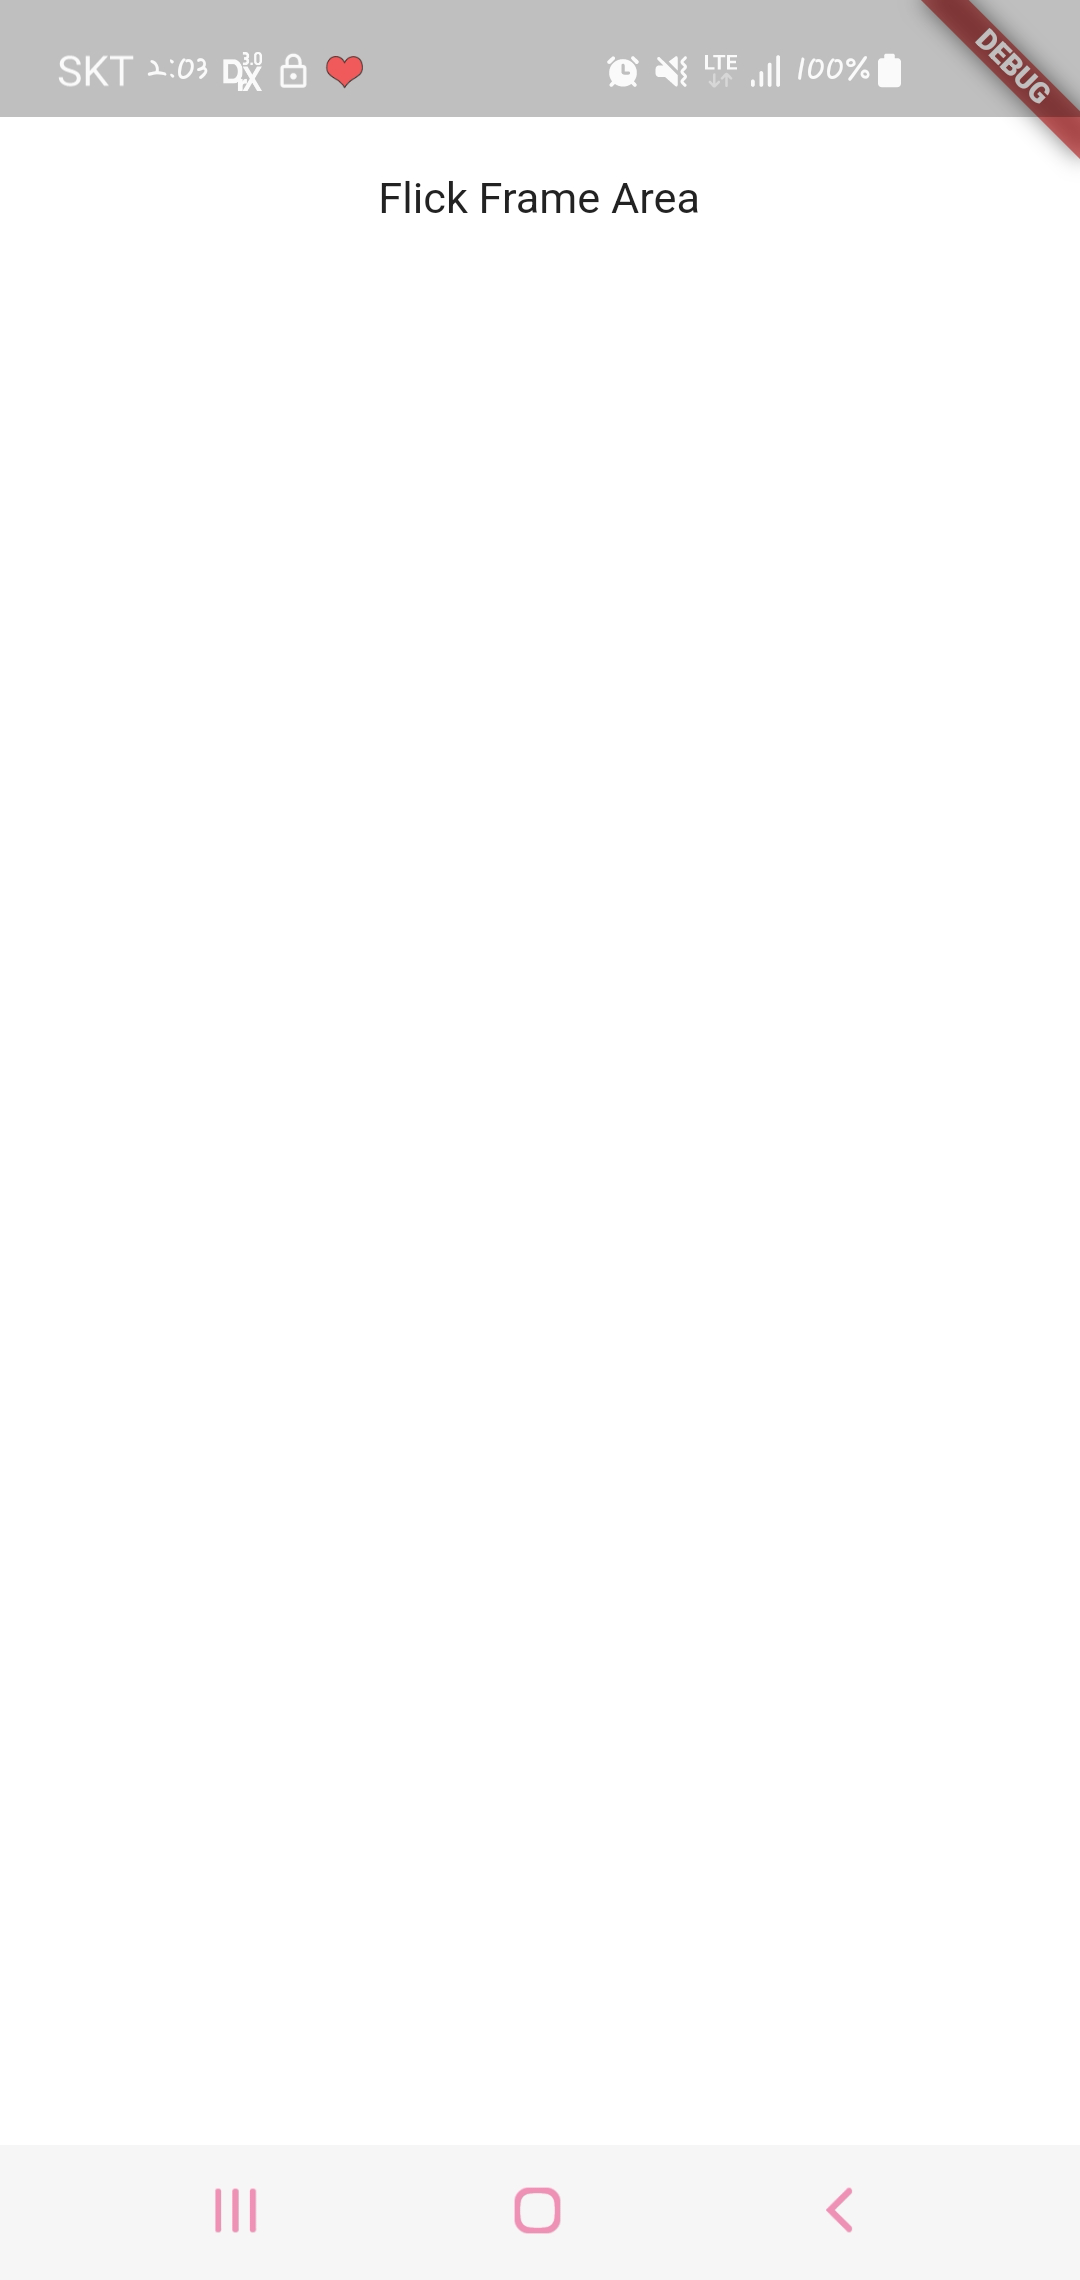
최대 크기(화면 전체였다)로 키웠을 때 그림자가 사라지게 하는 기능이 필요해서 그 부분만 추가로 작업해주었다.


import 'package:flutter/material.dart';
import 'package:get/get.dart';

class flickFrameCommon extends StatefulWidget {
  var mode; //soft, hard
  bool enabled;

  double height;
  double minHeight;
  double maxHeight;
  double middleHeight;

  EdgeInsets padding;
  Function changeHeight;//높이 값이 변화할 때 마다 flickFrameCommon를 호출한 곳에서 높이를 돌려 받을 수 있음
  Widget child;

  flickFrameCommon({
    Key key,
    this.mode = "soft",
    this.enabled = true,
    this.height = 52.0,
    this.minHeight,
    this.maxHeight,
    this.middleHeight,
    this.padding,
    this.changeHeight,
    @required this.child,
  }) : super(key: key);

  @override
  _flickFrameCommonState createState() => _flickFrameCommonState();
}

class _flickFrameCommonState extends State<flickFrameCommon> {
  int shadowAlpha = 125;
  double prevHeight;
  double Sensitivity = 100; //감도

  @override
  void initState() {
    super.initState();
    prevHeight = widget.height;

    if (widget.minHeight == null) {
      if (30 < widget.height && widget.height < 118.7 ) {
        widget.minHeight = widget.height;
      } else {
        widget.minHeight = 118.7;
      }
    }

    if (widget.mode != "hard" && widget.mode != "soft") {
      throw ArgumentError("The mode is soft or hard");
    }

    if (widget.height < widget.minHeight) {
      throw ArgumentError("The height is greater than the minimum value");
    }

    if (widget.maxHeight == null) {
      if (333.7 < widget.height && widget.height <= Get.height) {
        widget.maxHeight = widget.height;
      } else {
        widget.maxHeight = 333.7;
      }
    }

    if (widget.height > widget.maxHeight) {
      throw ArgumentError("The height is less than the maximum value");
    }

    if (widget.padding == null) {
      widget.padding = EdgeInsets.only(left: 18.3, right: 18.3);
    }

    if (widget.mode == "hard") {
      if (widget.middleHeight == null) {
        throw ArgumentError("middleHeight is a must when in hard mode");
      }
      setHardHeight();
    }
  }

  @override
  Widget build(BuildContext context) {
    if (widget.height == widget.maxHeight) {
      shadowAlpha = 0;
    } else {
      shadowAlpha = 125;
    }

    return Positioned(
      bottom: 0,
      child: AnimatedContainer(
        width: Get.width,
        height: widget.height,
        duration: Duration(milliseconds: 500),
        padding: widget.padding,
        decoration: BoxDecoration(
          borderRadius: BorderRadius.only(topLeft: Radius.circular(24), topRight: Radius.circular(24)),
          boxShadow: [BoxShadow(
              color: Color.fromARGB(shadowAlpha, 0, 0, 0),
              offset: Offset(0,3),
              blurRadius: 5,
              spreadRadius: 0,
          )],
          color: const Color(0xffffffff),
        ),
        child: Listener(
            behavior: HitTestBehavior.opaque,
            onPointerMove: (details){
              if (widget.enabled) {
                setState(() {
                //이동된 거리(details.delta.dy)는 위쪽으로 이동하면 -로 나오므로 현재 높이에 -를 해주면 +가 되어 높이가 커짐
                  if (widget.height - details.delta.dy < widget.minHeight) {//이동된 지점(현재 높이 - 이동된 거리)이 최저 높이보다 낮으면
                    widget.height = widget.minHeight;//높이를 최저 높이로 변경
                  } else
                  if (widget.height - details.delta.dy > widget.maxHeight) {//이동된 지점(현재 높이 - 이동된 거리)이 최대 높이보다 높으면
                    widget.height = widget.maxHeight;//높이를 최대 높이로 변경
                  } else {//최대와 최저 중간값이면 
                    widget.height = widget.height - details.delta.dy;//높이를 이동된 지점으로 변경
                  }
                });
              }
            },
            onPointerDown: (details) {//Pointer 이벤트가 시작할 때
              if (widget.enabled) {
                prevHeight = widget.height;//이전 높이를 저장
              }
            },
            onPointerUp: (details) {//Pointer 이벤트가 끝날 때
              if (widget.enabled) {
              	if (widget.mode == "hard") {
                  setState(() {
                    setHardHeight();//hard mode이면 최종 높이를 최저/중간/최대로 지정
                  });
                }

                if (widget.changeHeight != null) {
                  widget.changeHeight(widget.height);
                }
              }
            },
            child: Column(children: [
            Expanded(child: widget.child)
          ]),
        ),
      ),
    );
  }

  setHardHeight () {
    var minH_d = (widget.height - widget.minHeight).abs();//이벤트가 끝난 지점과 최저 높이의 거리 계산
    var maxH_d = (widget.height - widget.maxHeight).abs();//이벤트가 끝난 지점과 최대 높이의 거리 계산
    var middleH_d = (widget.height - widget.middleHeight).abs();//이벤트가 끝난 지점과 중간 높이의 거리 계산

    var direction = widget.height - prevHeight;

    if (prevHeight == widget.minHeight) {//이전 높이가 최저 높이였을 때
      if (direction > Sensitivity) {//감도보다 위쪽으로 이동한 거리가 높으면
        if (maxH_d < middleH_d) {//최대 높이의 거리가 중간 높이 거리보다 가까우면
          widget.height = widget.maxHeight;//현재 높이를 최대 높이로 변경
        } else {
          widget.height = widget.middleHeight;//현재 높이를 중간 높이로 변경
        }
      } else {
        widget.height = widget.minHeight;//감도가 낮으면 원래 높이로 이동
      }
    } else if (prevHeight == widget.maxHeight) {//이전 높이가 최대 높이였을 때
      if (direction < -1 * Sensitivity) {//감도보다 아래쪽으로 이동한 거리가 높으면
        if (minH_d < middleH_d) {//최저 높이의 거리가 중간 높이 거리보다 가까우면
          widget.height = widget.minHeight;//현재 높이를 최저 높이로 변경
        } else {
          widget.height = widget.middleHeight;//현재 높이를 중간 높이로 변경
        }
      } else {
        widget.height = widget.maxHeight;//감도가 낮으면 원래 높이로 이동
      }
    } else {
      if (direction > Sensitivity) {//감도보다 위쪽으로 이동한 거리가 높으면
        widget.height = widget.maxHeight;//현재 높이를 최대 높이로 변경
      } else if (direction < -1 * Sensitivity) {//감도보다 아래쪽으로 이동한 거리가 높으면
        widget.height = widget.minHeight;//현재 높이를 최저 높이로 변경
      } else {//감도가 낮으면 원래 높이로 이동
        widget.height = widget.middleHeight;//감도가 낮으면 원래 높이로 이동
      }
    }
  }
}


크게 soft(기본값) / hard mode가 있는데 soft mode가 이전에 사용했던 최저/최대 높이 내에서 자유롭게 움직일 수 있는 방식이고

hard mode가 이번에 새로 개발한 최저/중간/최고 높이로 이동하는 방식이다.


get은 3.26.0 버전을 사용하였고

Get.height와 Get.wight 현재 디바이스의 높이/넓이를 말한다.

다른 방식으로 높이와 넓이를 구할 수 있으면 사용하지 않아도 된다.


ex) 

import 'dart:async';

import 'package:blog/widget/flick_frame_common.dart';
import 'package:flutter/material.dart';
import 'package:get/get.dart';

class Test extends StatefulWidget {
  @override
  _TestState createState() => _TestState();
}

class _TestState extends State<Test> {
  double realMaxHeight = Get.height;
  double height;
  double minHeight = 52.0;
  double middleHeight = 296.0;

  @override
  void initState() {
    super.initState();

    height = minHeight;

    Future.delayed(Duration.zero, () async {
      setState(() {
        realMaxHeight = Get.height
            - MediaQuery.of(context).padding.top
            - MediaQuery.of(context).padding.bottom;
      });
    });
  }

  @override
  void dispose() {
    super.dispose();
  }

  @override
  Widget build(BuildContext context) {
    return Scaffold(
      backgroundColor: Color(0xffffffff),
      body: SafeArea(
        child: Container(
          width: Get.width,
          height: Get.height,
          child: Stack(children: [
            Container(
              width: Get.width,
              height: Get.height,
              alignment: Alignment.center,
              child: Text("Content Area"),
            ),
            flickFrameCommon(
              mode: "hard",
              height: height,
              padding: EdgeInsets.only(top: 20),
              minHeight: minHeight,
              middleHeight: middleHeight,
              maxHeight: realMaxHeight,
              changeHeight: (height) {
                setState(() {
                  this.height = height;
                });
              },
              child: Column(
                children: [
                  Text("Flick Frame Area")
                ],
              ),
            )
          ]),
        )
      ),
    );
  }
}


왼쪽 부터 순서대로 Filck Frame이 최저/중간/최고 높이일 때 화면

반응형
:
Posted by 리샤씨
반응형

td에 tooltip을 추가하면 해당 td에 마우스 오버시 tooltip이 td 사이에 생기면서 td가 하나씩 옆으로 밀려나는 현상이 발생한다.

그럴 때 tooltip이 있는 td에 data-container="body" 속성을 추가하면 td가 밀려나지 않고 예쁘게 보이게 된다.

<td data-container="body" data-toggle="tooltip" title="테스트입니다.">
 테스트
</td>


그리고 꼭 td에 tooltip을 추가할 때 뿐만 아니라,

table 안에 어떠한 태그에 tooltip을 추가했을 때 해당 tooltip이 table 영역을 벗어나서

tooltip이 잘린다면 그 때에도 data-container="body" 속성을 추가하면 간단히 해결할 수 있다.

<td>
    <a href="test.html" data-container="body" data-toggle="tooltip" title="테스트입니다.">
        테스트
    </a>
</td>


참고 출처 : https://stackoverflow.com/questions/21938008/bootstraps-tooltip-moves-table-cells-to-right-a-bit-on-hover


반응형
:
Posted by 리샤씨
반응형

오늘 Flutter로 개발된 어플리케이션의 입력 창에서 길게 누를 때 표시되는

자르기/복사/붙여넣기/모두선택(Cut / Copy / Paste / Select all) 한국어 변경 적용을 요청받았다

다행히도 어렵지 않게 한국어 적용이 가능해서 방법을 공유하겠다.


1. pubspec.yaml을 수정한다.

dependencies:
  flutter:
    sdk: flutter
  flutter_localizations: # Add this line
    sdk: flutter         # Add this line


2. main.dart를 수정한다.

import 'package:flutter_localizations/flutter_localizations.dart';

...

return const MaterialApp(
  title: 'Localizations Sample App',
  localizationsDelegates: [
    GlobalMaterialLocalizations.delegate,
    GlobalWidgetsLocalizations.delegate,
    GlobalCupertinoLocalizations.delegate,
  ],
  supportedLocales: [
    Locale('en', ''),
    Locale('ko', ''),
  ],
  home: MyHomePage(),
);

...


참고 출처

- https://stackoverflow.com/questions/52100400/flutter-how-to-change-tooltip-name-of-paste-on-textfield-to-devices-language

- https://docs.flutter.dev/development/accessibility-and-localization/internationalization

반응형
:
Posted by 리샤씨
반응형

업데이트 체크를 new_version 패키지로 잘 하고 있었는데 어느 순간 아래와 같이

Bad state: No element Exception이 발생하면서 정상 작동되지 않았다.

E/flutter ( 5782): [ERROR:flutter/lib/ui/ui_dart_state.cc(186)] Unhandled Exception: Bad state: No element
E/flutter ( 5782): #0      ListMixin.firstWhere (dart:collection/list.dart:167:5)
E/flutter ( 5782): #1      NewVersion._getAndroidStoreVersion (package:new_version/new_version.dart:152:51)


확인 결과,

Future<VersionStatus?> _getAndroidStoreVersion(
      PackageInfo packageInfo) async {
    final id = androidId ?? packageInfo.packageName;
    final uri =
        Uri.https("play.google.com", "/store/apps/details", {"id": "$id"});
    final response = await http.get(uri);
    if (response.statusCode != 200) {
      debugPrint('Can\'t find an app in the Play Store with the id: $id');
      return null;
    }
    final document = parse(response.body);

    final additionalInfoElements = document.getElementsByClassName('hAyfc');
    final versionElement = additionalInfoElements.firstWhere(
      (elm) => elm.querySelector('.BgcNfc')!.text == 'Current Version',
    );
    final storeVersion = versionElement.querySelector('.htlgb')!.text;

    final sectionElements = document.getElementsByClassName('W4P4ne');
    final releaseNotesElement = sectionElements.firstWhereOrNull(
      (elm) => elm.querySelector('.wSaTQd')!.text == 'What\'s New',
    );
    final releaseNotes = releaseNotesElement
        ?.querySelector('.PHBdkd')
        ?.querySelector('.DWPxHb')
        ?.text;

    return VersionStatus._(
      localVersion: packageInfo.version,
      storeVersion: storeVersion,
      appStoreLink: uri.toString(),
      releaseNotes: releaseNotes,
    );
  }

위의 소스에서 보이듯이 new_version에서 Android는 https://play.google.com/store/apps/details 페이지로 접속해서

hAyfc 클래스를 가져와서 현재 스토어에 올라온 버전이 무엇인지 확인하는 과정이 있는데 

플레이 스토어가 리뉴얼 하면서 그냥 https://play.google.com/store/apps/details?id=com.nhn.android.search로 접속하면 

hAyfc 클래스가 없기 때문에 정상 작동은 커녕 오류를 발생하는 것으로 보였다.


이전과 같은 페이지를 보려면 다음과 같이 파라메터에 gl=us를 추가로 보내주면

(https://play.google.com/store/apps/details?id=com.nhn.android.search&gl=us)

hAyfc 클래스가 존재해서, 위 소스의 5번째 줄에 아래 처럼 코드를 수정하면 정상 동작하는 것을 확인하였다.

Uri.https("play.google.com", "/store/apps/details", {"id": "$id", "gl": "US"});


해당 소스의 위치는 나는 mac 환경이고 new_version 버전은 0.2.3을 사용하였기 때문에

/Users/${userId}/.pub-cache/hosted/pub.dartlang.org/new_version-0.2.3/lib/new_version.dart

여기에 저장되어 있었다.


반응형
:
Posted by 리샤씨


반응형
반응형